Blog
How to Start Your First DIY Diamond Painting Project
Diamond painting has quickly become one of the most popular and satisfying crafts for those who love to relax, express their artistic side, or create personalized art to adorn their homes. Imagine combining the soothing process of paint-by-numbers with the sparkling beauty of tiny rhinestones—this is what makes DIY diamond painting such a rewarding experience. Whether you’re looking to unwind after a long day or want to add a unique touch to your décor, DIY diamond painting is the perfect way to channel your creativity. If you’ve ever wondered how to get started with this fascinating hobby, you’re in the right place!
In this guide, we’ll take you step-by-step through everything you need to know to start your very first DIY diamond painting project. By the end, you’ll be well on your way to creating a stunning masterpiece that shines with every facet. Let’s dive into the sparkling world of diamond painting and make your creative journey a fun and rewarding one!
What is DIY Diamond Painting?
Before we start, let’s make sure we’re all on the same page. DIY diamond painting is a modern craft that combines the beauty of cross-stitch and paint-by-numbers. Using tiny resin rhinestones or “diamonds,” you’ll place them on a pre-printed canvas to create a stunning, sparkling image. The end result is a beautiful piece of artwork that you can proudly display at home.
- Perfect for Beginners: Whether you’re new to crafting or a seasoned DIYer, DIY diamond painting is designed to be simple and fun. The instructions are clear, and the process is easy to follow, making it ideal for anyone wanting to try their hand at creating art.
- Relaxing and Rewarding: Not only does DIY diamond painting produce beautiful results, but it’s also a relaxing and meditative process. It’s a great way to unwind after a busy day, with the added bonus of creating something amazing by the end!
The best part? It’s incredibly easy to get started, even if you’re a complete beginner. All you need is a DIY diamond painting kit and a little patience.
Step 1: Choose Your DIY Diamond Painting Kit
When you start your DIY Diamond Painting journey, selecting the right kit is key. There are plenty of options, and finding the one that suits your style and experience level will make the process much smoother. Here’s how to choose:
- Design: Pick a design that excites you! Whether it’s a landscape, portrait, floral design, or custom photo, the options are endless. For beginners, we recommend starting with simpler designs that don’t have too many color variations. A great DIY diamond painting design will keep you motivated throughout the process.
- Size: Kits come in different sizes—small, medium, and large. Larger canvases offer more detail but may take longer to complete. For your first DIY diamond painting project, consider starting with a smaller size to build your confidence. You can always move to larger projects once you’re comfortable!
- Quality: Look for a high-quality kit with good resin diamonds and a clear canvas. A good quality DIY diamond painting kit should have a sticky adhesive layer that holds the diamonds in place, and the diamonds should fit snugly into the canvas without gaps. Quality materials will ensure a smooth and enjoyable experience
Final Thoughts
Choosing the right DIY diamond painting kit sets the foundation for a successful and fun project. By picking a design, size, and quality that suits your style and skill level, you’re sure to enjoy the creative process and achieve beautiful results. Happy crafting!
Step 2: Gather Your Tools
Once you’ve selected your kit, it’s time to gather your tools. Don’t worry; everything you need is usually included in the DIY diamond painting kit! Here’s what to expect:
- Canvas: The pre-printed canvas is where the magic happens. The design will be printed with numbers or symbols that correspond to specific diamond colors, making it easy to follow as you work on your DIY diamond painting
- Diamonds (Resin Rhinestones): These tiny rhinestones are what make up the design. They come in various colors and are what give the finished artwork its shimmering effect. The quality of the diamonds is essential to achieving the best DIY diamond painting
- Diamond Applicator Tool: This tool helps you pick up and place the diamonds on the canvas. It’s like a pen with a wax tip that makes picking up and positioning the diamonds easy and precise. This tool is key to a smooth and enjoyable DIY diamond painting
- Trays: The trays help organize your diamonds, so they don’t get mixed up. They also help you “shake” the diamonds so they’re all facing the right way, making the process more efficient.
- Wax: A small block of wax is included in the kit to help the applicator tool pick up the diamonds. Simply dip the tip of the tool into the wax before picking up the diamonds. This ensures a secure grip on the DIY diamond painting
- Tweezers: Some kits also come with tweezers for placing diamonds in tighter spots, but these aren’t always necessary. Tweezers can be handy for precision work on your DIY diamond painting.
Final Thoughts
With all the essential tools gathered, you’re ready to start your DIY diamond painting project with confidence. From the applicator tool to the diamonds, everything is designed to make your creative journey fun and hassle-free. Enjoy the process, and soon you’ll have a beautiful piece of sparkling art to admire!
Step 3: Set Up Your Workspace
To start your DIY Diamond Painting, find a comfortable, well-lit workspace. Here are a few tips for setting up your space:
- Lighting: Good lighting is crucial. The tiny diamonds can be hard to see, so make sure your workspace is well-lit. Consider using a desk lamp with adjustable brightness or even a magnifying lamp for a clearer view, especially for your DIY diamond painting
- Flat Surface: Lay your canvas on a flat surface to keep the adhesive smooth and avoid wrinkles or bubbles. A hard, smooth table or desk is ideal for working on your DIY diamond painting
- Keep Everything Organized: Lay out your diamonds in an organized fashion. Use small bowls, containers, or the tray provided to keep the colors separated. An organized workspace makes your DIY diamond painting experience much more enjoyable and efficient.
Final Thoughts
Creating the perfect workspace for your DIY diamond painting project is essential for a smooth and enjoyable experience. With good lighting, a flat surface, and organized tools, you’re all set to begin your journey into the world of diamond painting. Let the creative fun begin!
Step 4: Start Placing Your Diamonds
Now for the fun part—placing your diamonds! Here’s how to start:
- Pick a Section: You don’t need to start at the top. You can choose any section of the canvas to begin with, depending on your preference. Most people work in small areas to avoid smudging. This method is especially helpful when working on your DIY diamond painting.
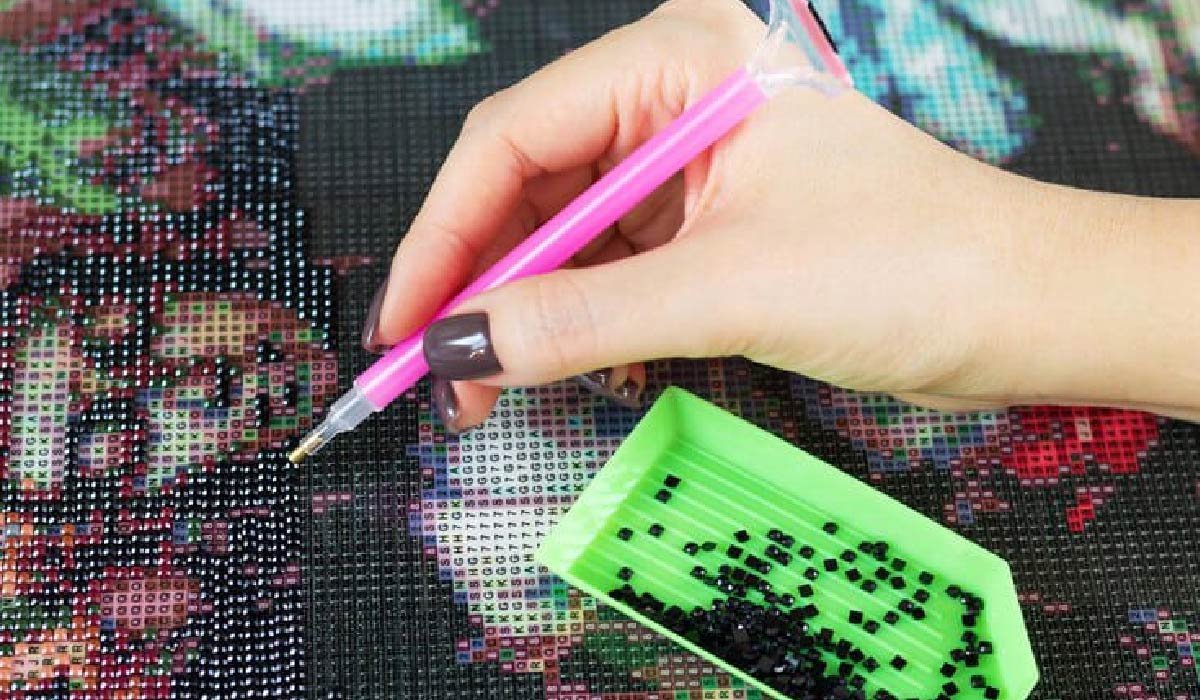
- Match the Symbols: Each section of your canvas will have a number or symbol. Find the corresponding color of diamonds and start placing them. Using the diamond applicator tool, dip the tip into the wax, pick up a diamond, and gently place it on the canvas where the symbol matches. This is the core of the DIY diamond painting
- Keep Going: Continue placing diamonds until you finish the section. Once done, move on to the next section. Don’t worry if you make a mistake—just gently lift the diamond with your tweezers and reposition it. The beauty of DIY diamond painting is that you can always correct your mistakes as you go.
- Press Down: After filling in a section, lightly press down on the diamonds with your fingers or a flat object to ensure they adhere well to the canvas. Pressing down helps the diamonds stick securely in your DIY diamond painting
Final Thoughts
Placing the diamonds is the most rewarding part of your DIY diamond painting project. As you go along, the image will come to life, and soon, you’ll have a stunning masterpiece to display. Keep a steady pace, and remember, the journey is just as enjoyable as the finished artwork!
Step 5: Complete Your DIY Diamond Painting
Add main ekyword 4times add ednign para also
Step 6: Frame and Display Your Artwork
Once you’ve completed your first DIY Diamond Painting project, you’ll want to frame it and display it proudly. Here’s how:
- Trim the Canvas: If there’s any excess canvas around the design, carefully trim it with scissors, leaving a small border.
- Frame It: You can either use a pre-made frame or take your canvas to a framing shop for a custom frame. Many people opt for a simple, sleek frame to let the artwork speak for itself.
- Hang It Up: Whether it’s above your bed, in the living room, or even in your office, DIY diamond paintings make for beautiful home décor that’s sure to impress.
Why DIY Diamond Painting Is Perfect for You
If you’re looking for a creative and stress-relieving hobby, DIY Custom Diamond Painting is perfect. It’s therapeutic, keeps your hands busy, and lets your mind wander as you work on your design. Plus, you’ll end up with a stunning piece of art to decorate your home with or give as a heartfelt gift.
For example, imagine completing a beautiful DIY diamond painting of a sunset over the ocean. As you place each sparkling diamond, you not only create a captivating image but also enjoy the calming process. Once finished, you could frame it and hang it in your living room as a statement piece or gift it to a loved one who enjoys ocean views.
DIY Diamond Painting is not just about the end result—it’s the journey that makes it a truly rewarding experience.
Order Your DIY Diamond Painting Kit Today!
Starting your first DIY Diamond Painting project is a rewarding and fulfilling experience. With the right kit, tools, and a little patience, you’ll be able to create a beautiful, sparkling masterpiece that you can proudly display. Whether you’re a complete beginner or a seasoned crafter, diamond painting is an enjoyable and relaxing way to express your creativity.
So, grab your DIY Diamond Painting kit, set up your workspace, and dive into the world of diamond painting. Your masterpiece awaits!
Call to Action
Ready to start your creative journey? Book your DIY Diamond Painting kit with us today and get everything you need to begin! Order now and bring your artistic vision to life!

Chinese Technical Translation: Manufacturing & Engineering

WeChat Account Verification: What Documents Your Agency Will Request

Adult ADHD in Calgary: How a Psychologist Assesses and Treats It

Common first-time buyer mortgage mistakes and how to avoid them

How AI Is Turning Words and Still Images Into Shareable Stories

What you can learn from checking a vehicle’s registration plate

Where to Get a Genuine Free Psychic Question Answered

How To Choose A Primary Care Doctor: What To Look For Before Your First Appointment

How to Legally Reduce Your Personal Tax Bill Before the HMRC Deadline?

A Complete Guide To Military Court Martial Defense When Everything Feels On The Line

Who Is Jennifer Rauchet?: All You Need To Know About Pete Hegseth’s Wife

Who Is Mindy Jennings?: All You Need To Know About Ken Jennings Wife

Who Is Klarissa Munz: The Untold Story of Freddie Highmore’s Wife

Who Is Mallory Plotnik?: The Untold Story of Phil Wickham’s Wife

Who Is Enrica Cenzatti?: The Untold Story of Andrea Bocelli’s Ex-Wife

Meet Christina Erika Carandini Lee?: All You Need To Know Christopher Lee’s Daughter

Who Is Jasmine Gong?: The Life and Legacy of Brad Williams Wife

Can Anything Be Done About the Skyrocketing Prices of Essential Medicines?

Who Is Allison Butler?: The Life and Influence of Kirk Herbstreit Wife

Who Is Terrance Michael Murphy?: Everything about Audie Murphy’s Son
Chinese Technical Translation: Manufacturing & Engineering
WeChat Account Verification: What Documents Your Agency Will Request
Adult ADHD in Calgary: How a Psychologist Assesses and Treats It
Common first-time buyer mortgage mistakes and how to avoid them
How AI Is Turning Words and Still Images Into Shareable Stories
What you can learn from checking a vehicle’s registration plate
Where to Get a Genuine Free Psychic Question Answered
How To Choose A Primary Care Doctor: What To Look For Before Your First Appointment
How to Legally Reduce Your Personal Tax Bill Before the HMRC Deadline?
A Complete Guide To Military Court Martial Defense When Everything Feels On The Line

 Celebrity2 years ago
Who Is Jennifer Rauchet?: All You Need To Know About Pete Hegseth’s Wife
- Celebrity2 years ago
Who Is Mindy Jennings?: All You Need To Know About Ken Jennings Wife
- Celebrity2 years ago
Who Is Klarissa Munz: The Untold Story of Freddie Highmore’s Wife
- Celebrity2 years ago
Who Is Mallory Plotnik?: The Untold Story of Phil Wickham’s Wife